Updated 22 MARCH 26
Note: These notes are for my reference using information apt to my setup. Yours may differ.
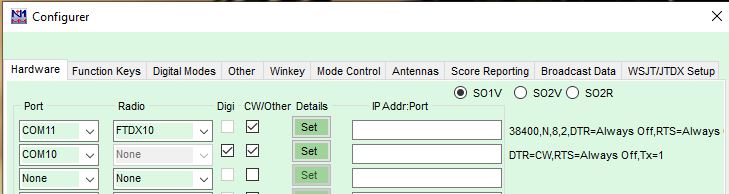
Using USB drivers from yaesu.com gives two COM ports and two audio ports.
One Enhanced for serial connection to the Radio and a Standard port for CW and data modes.
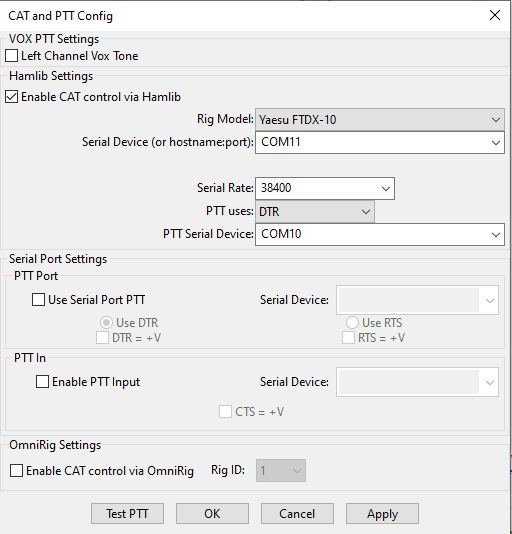
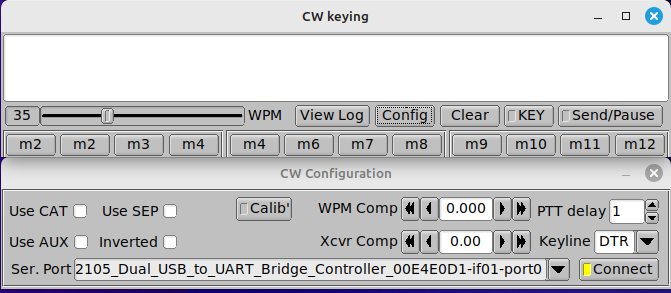
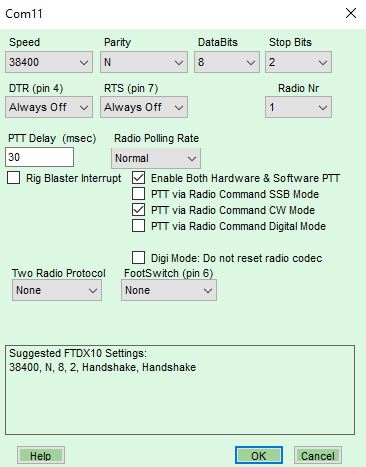
SilIcon Labs Dual CP210x USB to UART Bridge: Enhanced COM port (My COM11)
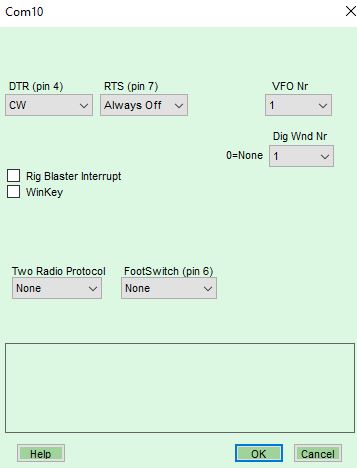
Silicon Labs Dual CP210x USB to UART Bridge: Standard COM Port (My COM10)
(Substitute your COM port numbers for your setup.)
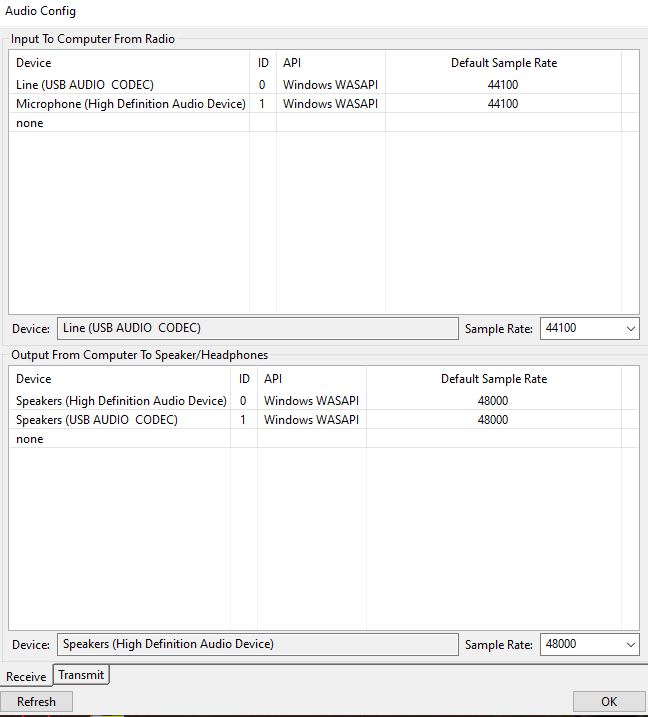
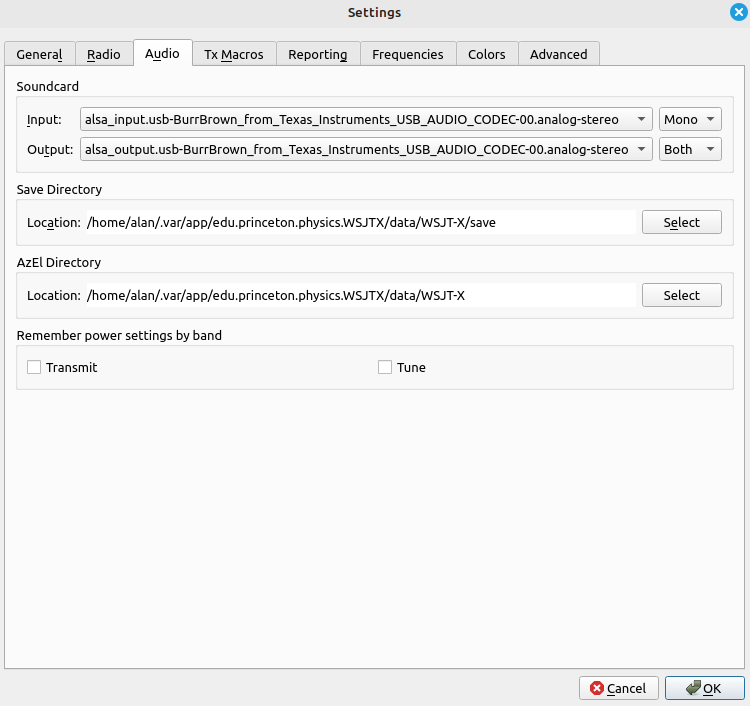
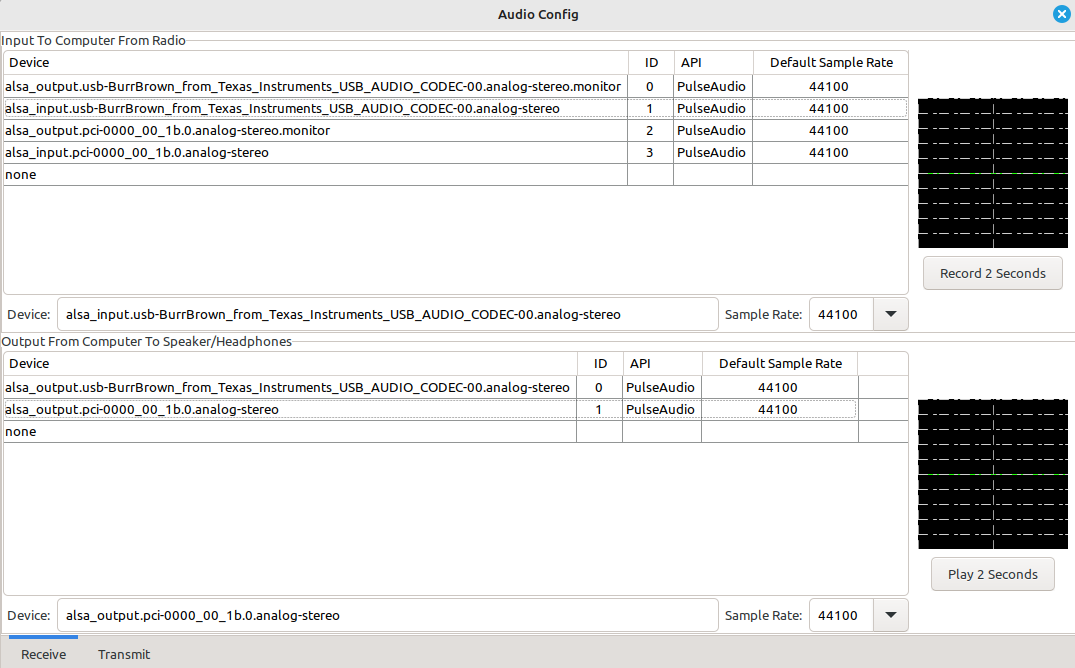
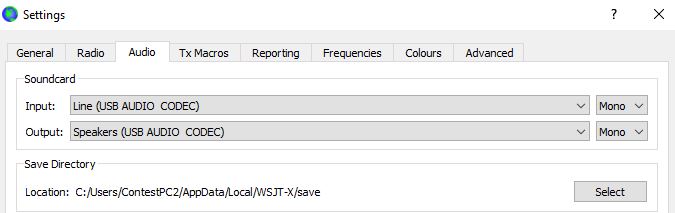
Audio ports - Line (USB AUDIO CODEC) and Speakers (USB AUDIO CODEC)
Note that if a 911A is also connected the ports are shown as:
Microphone (USB Audio CODEC) and Speakers (USB Audio CODEC)
where the difference is the upper and lowe case of the word Audio.
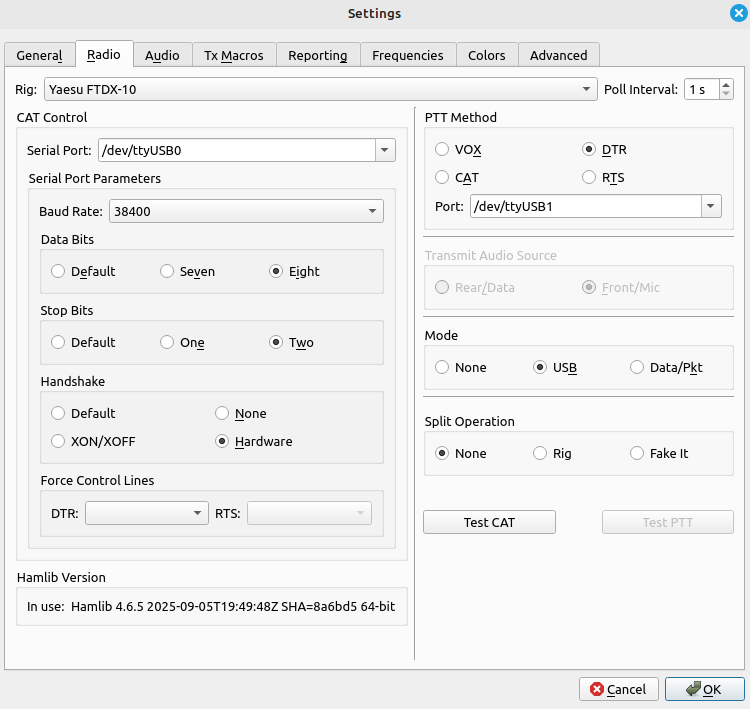
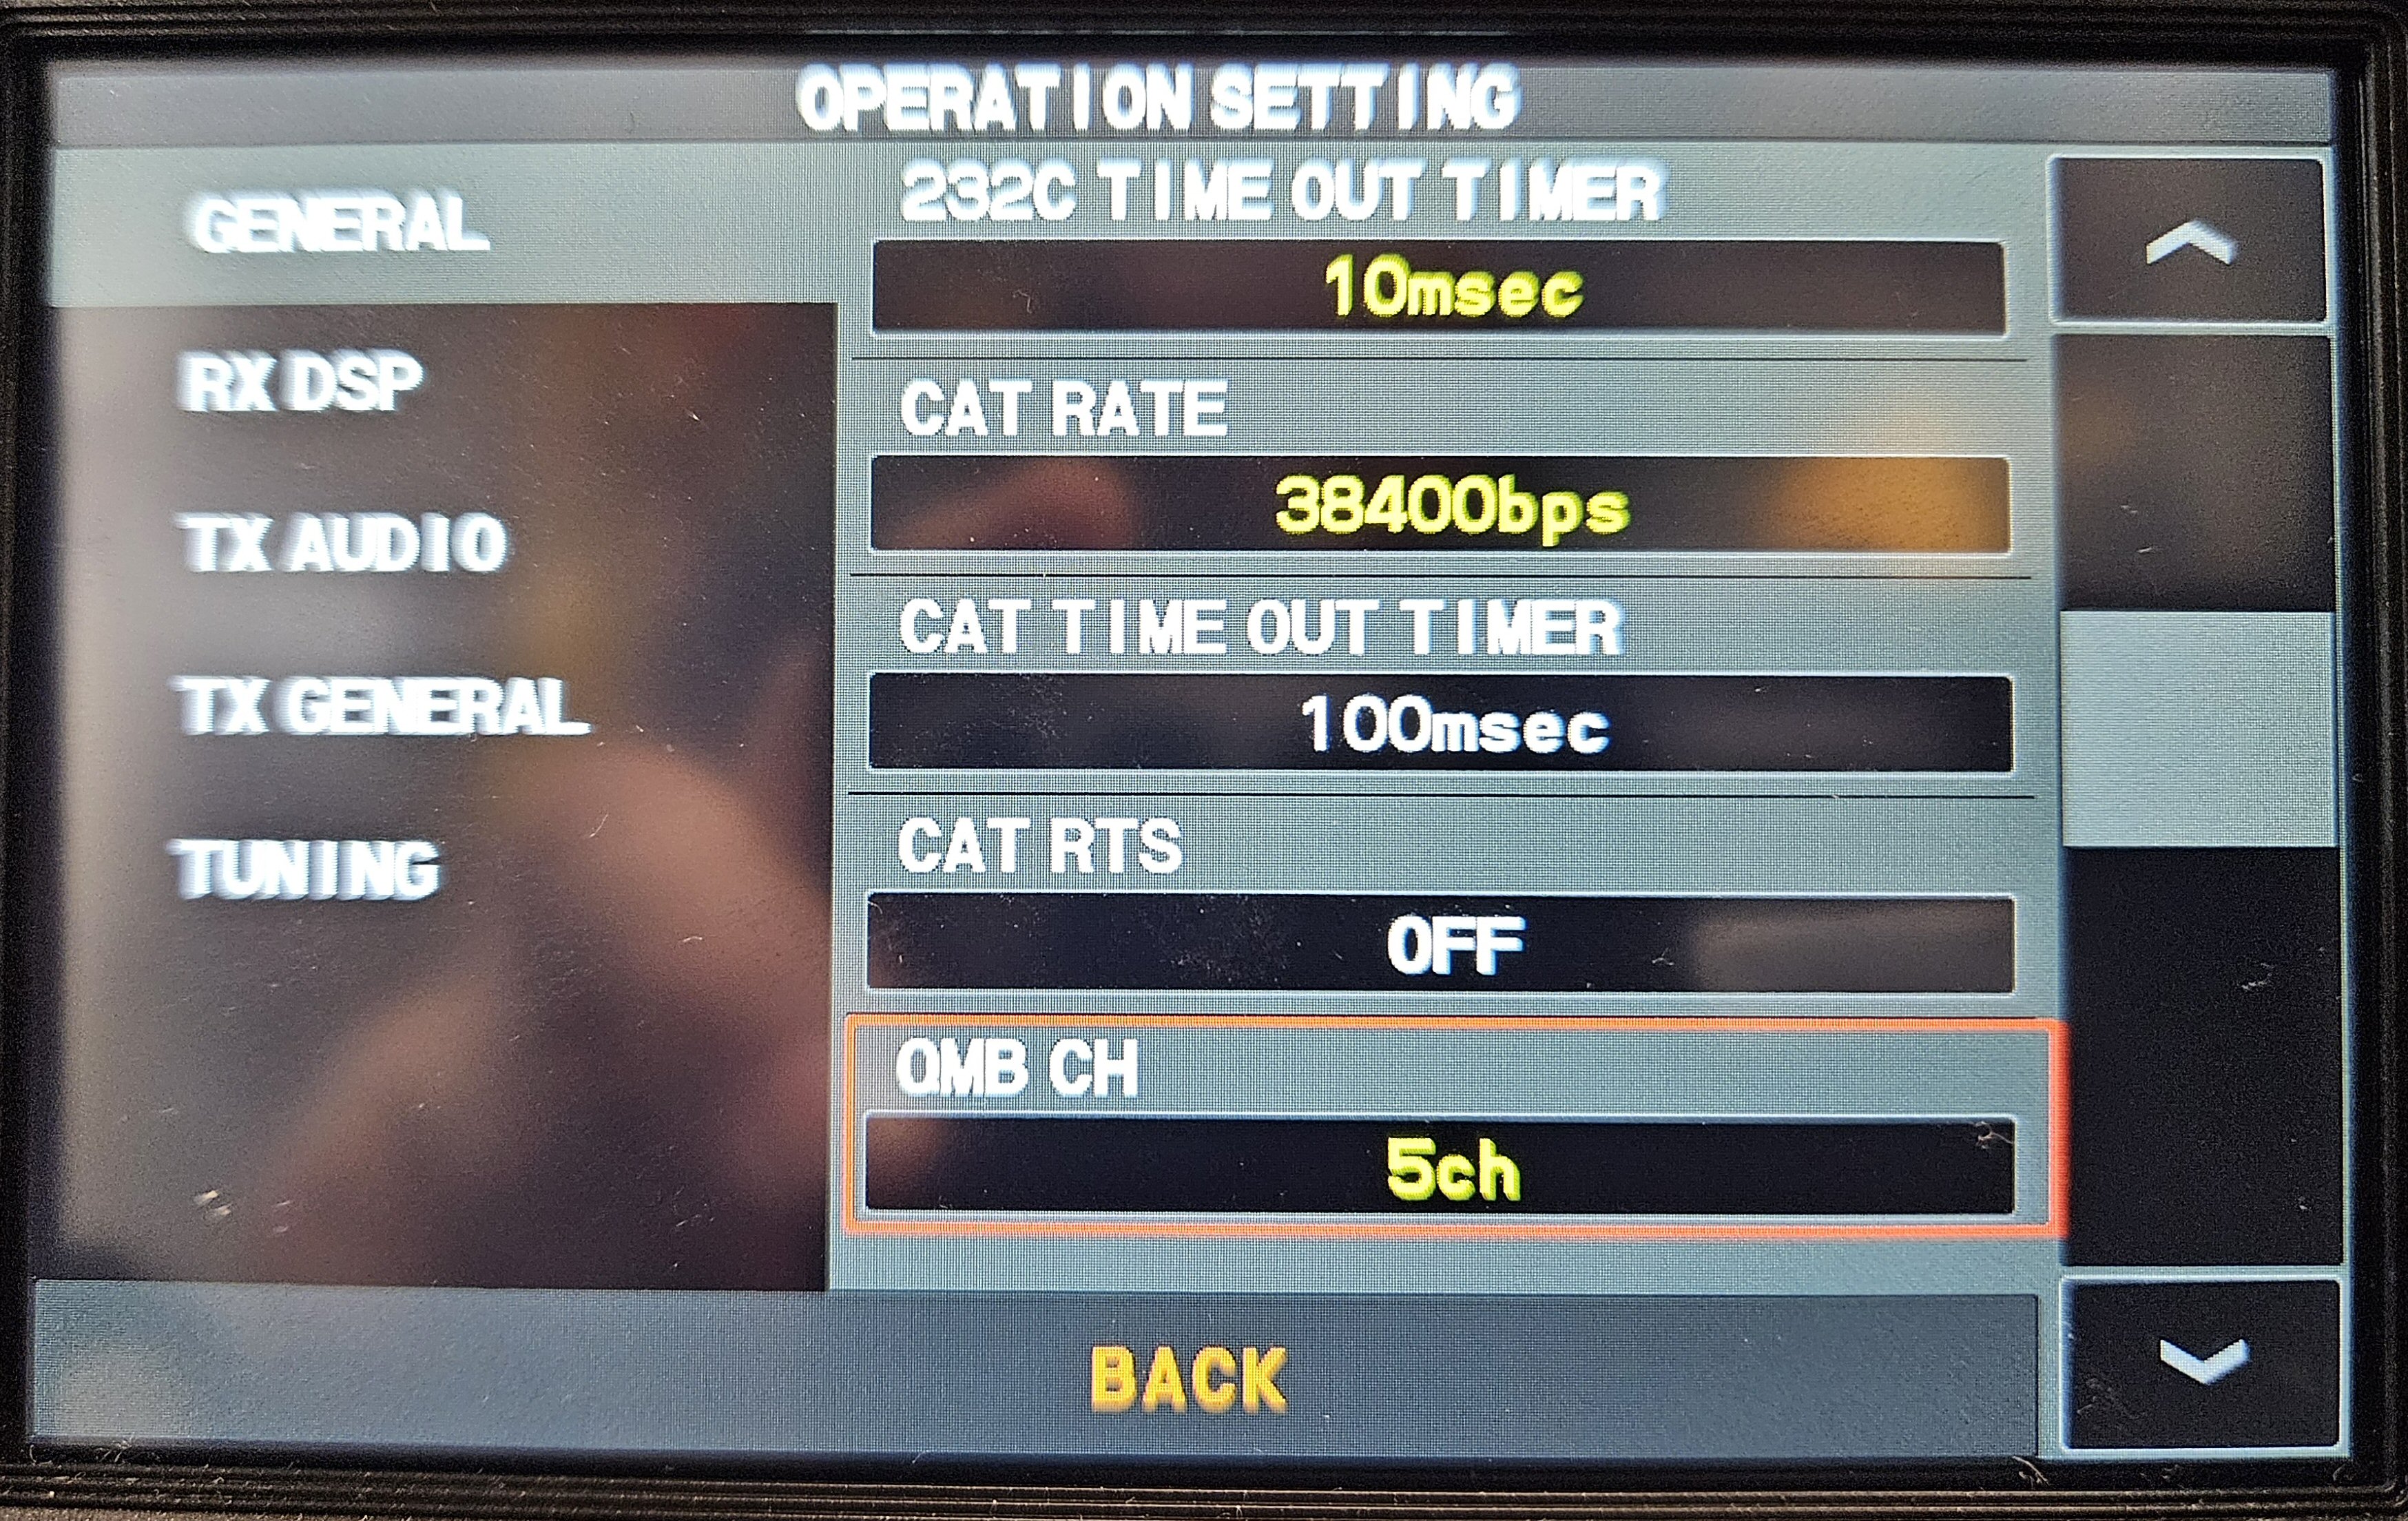
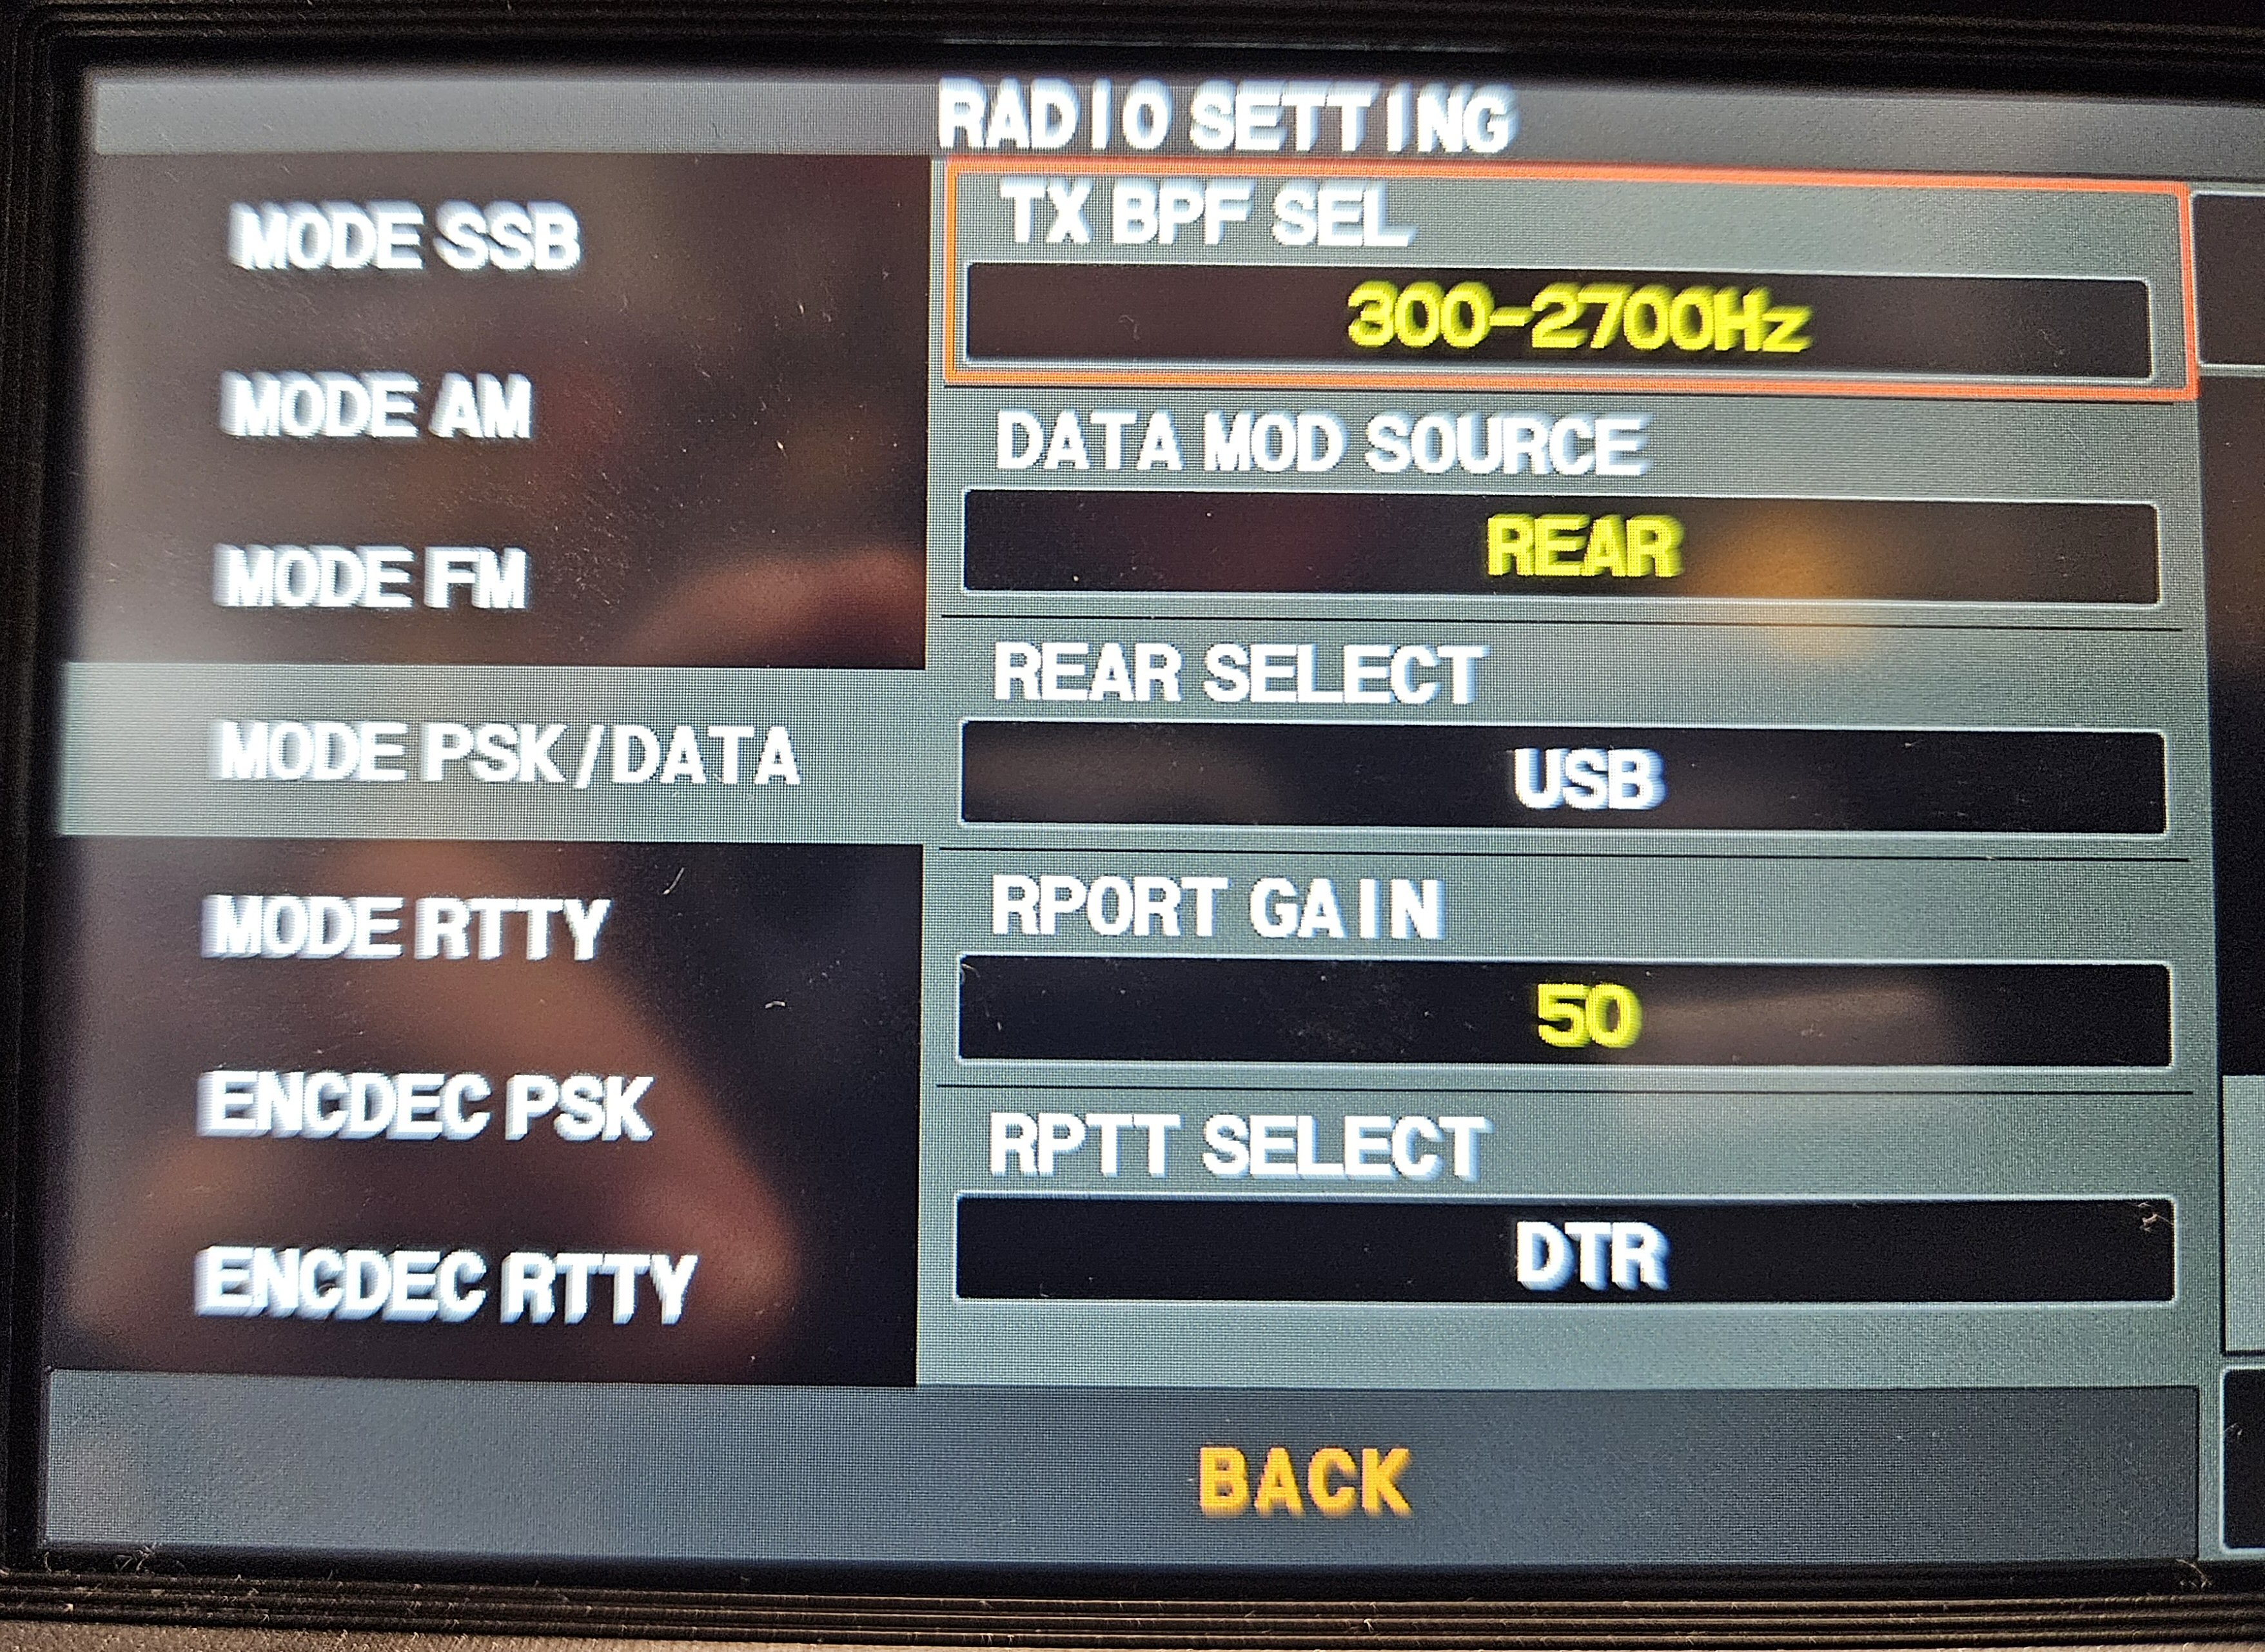
Note: 232C Rate is for 9 pin serial cable, and CAT rate is for USB connection.
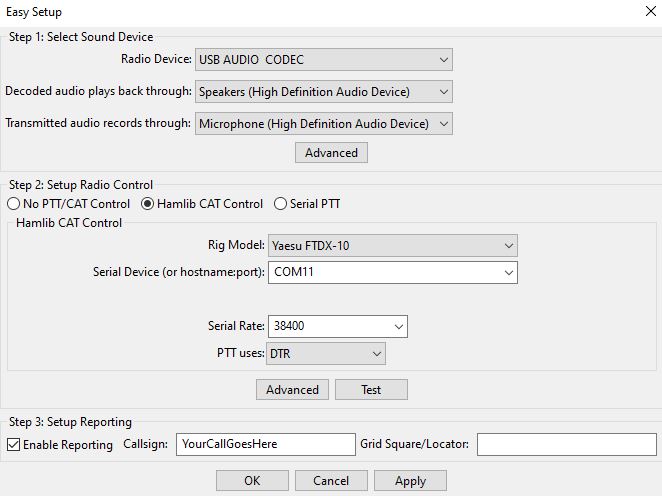
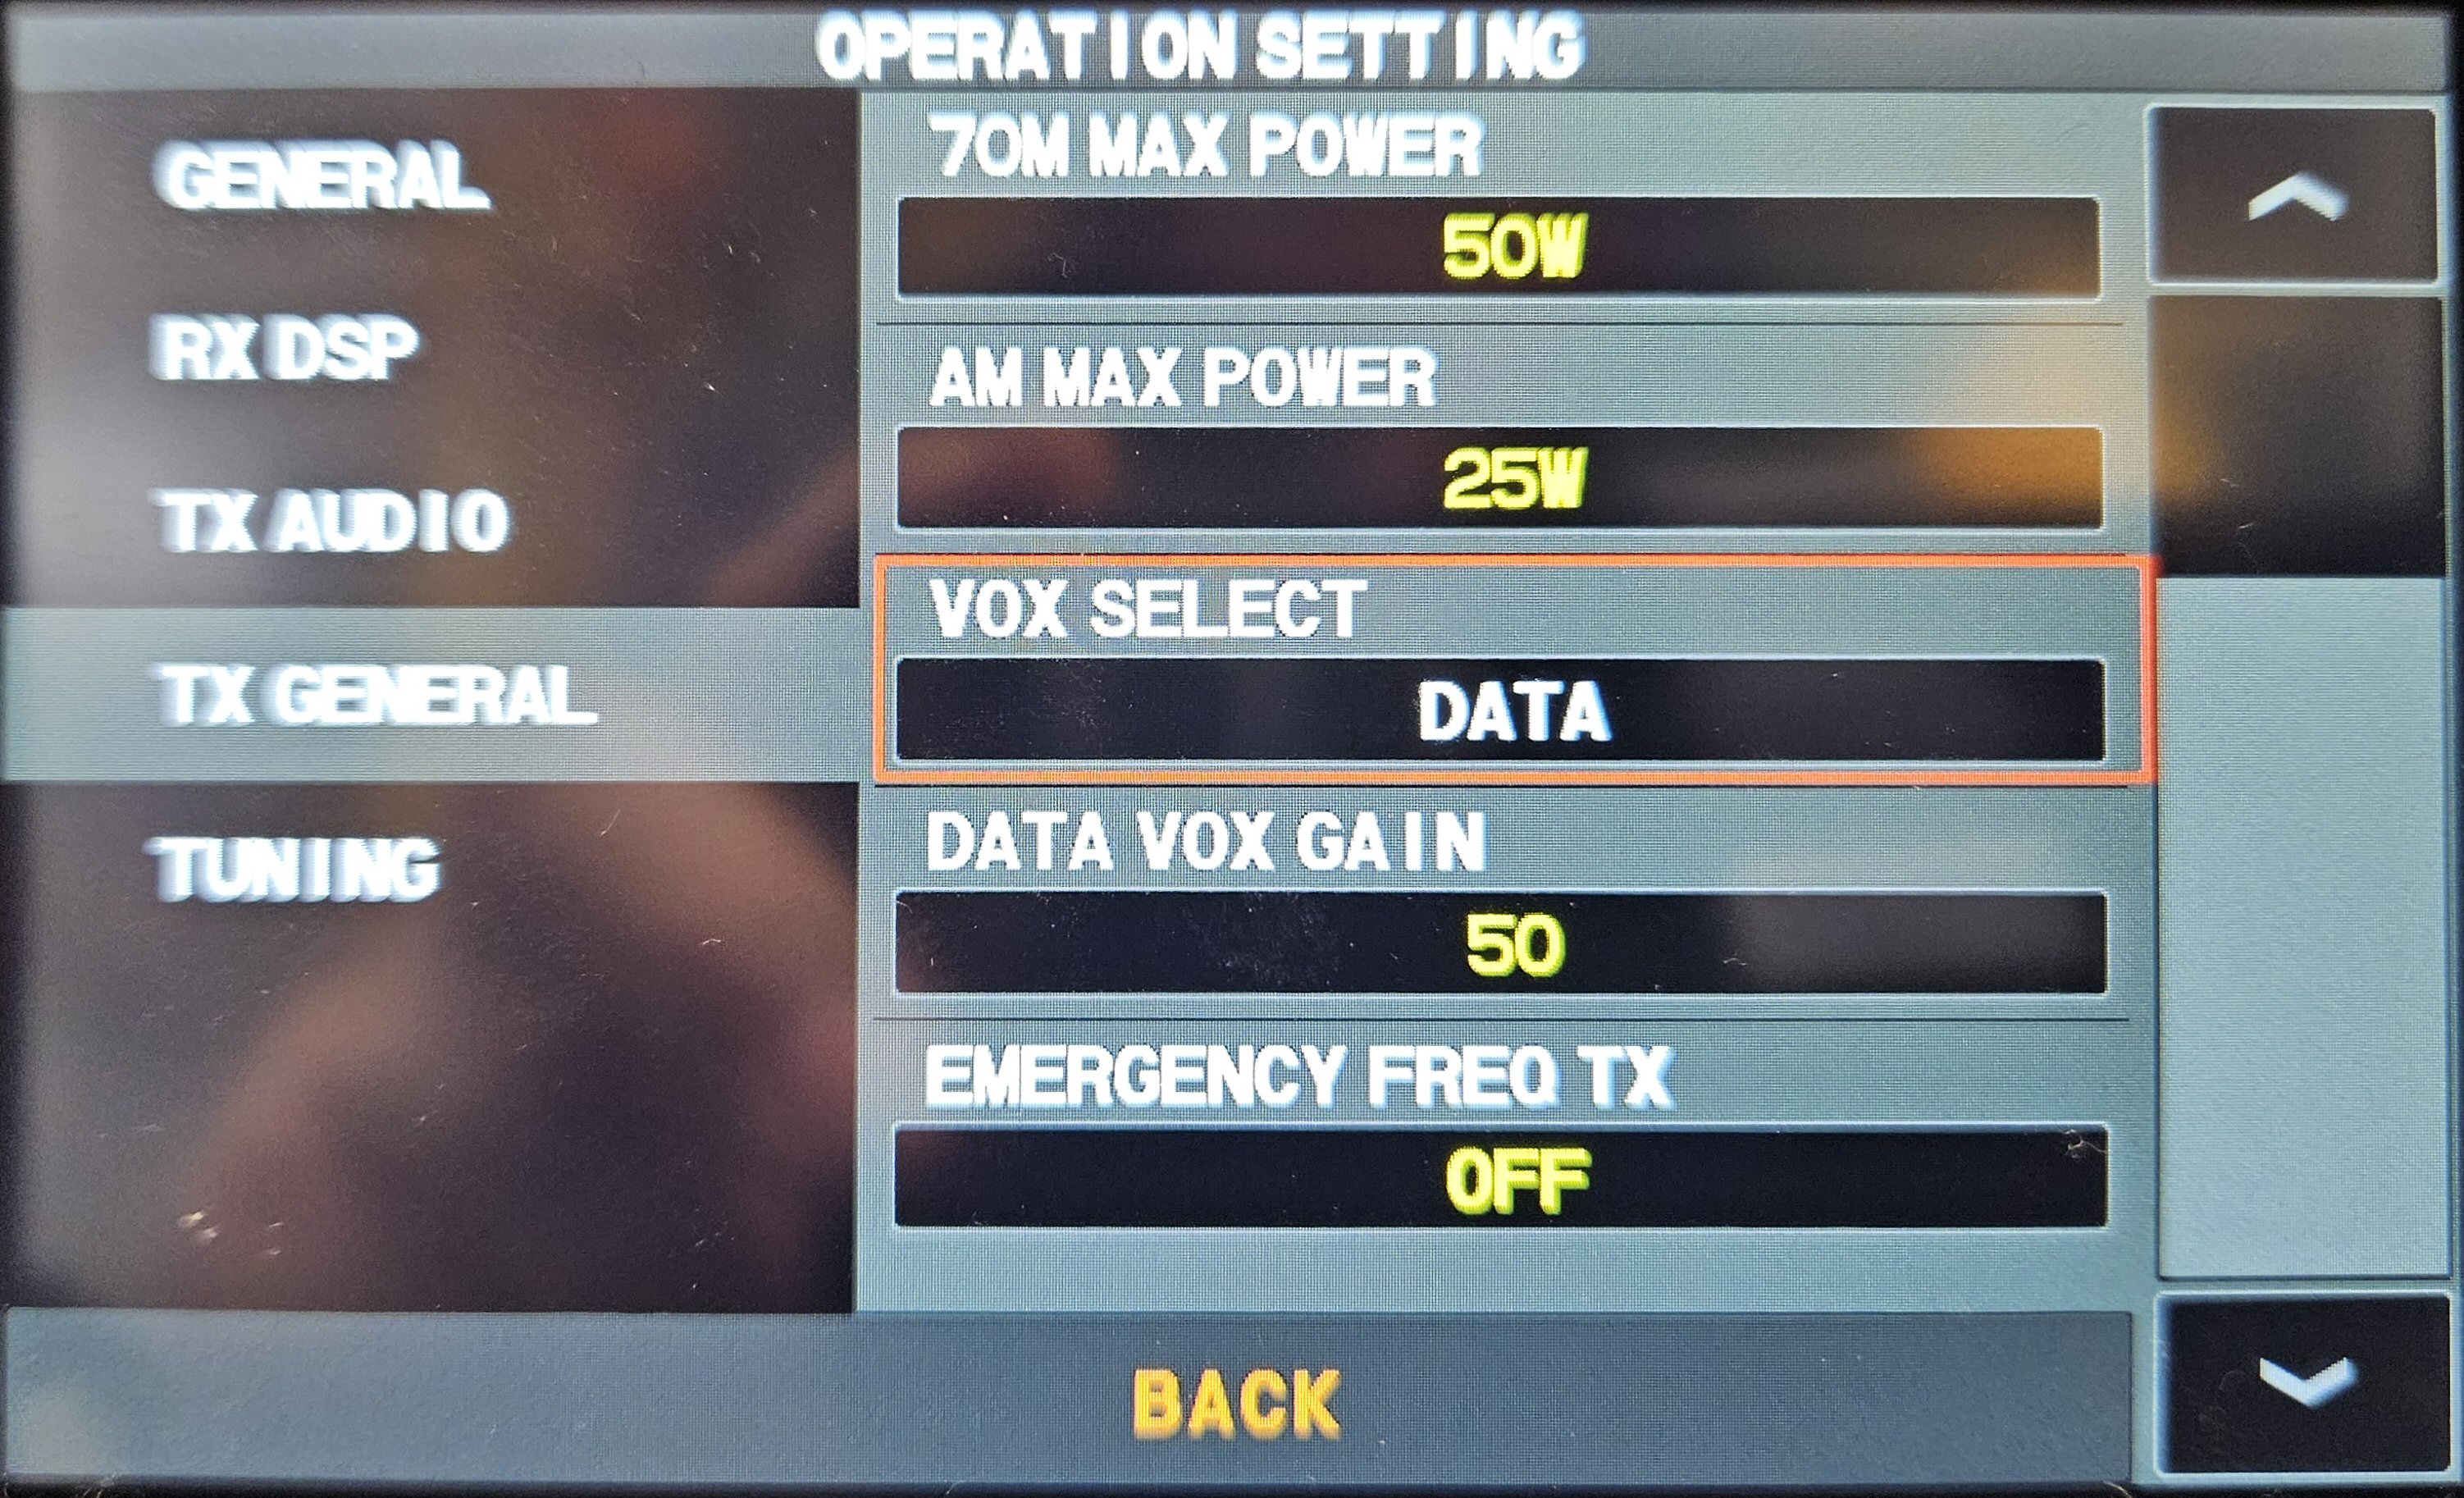
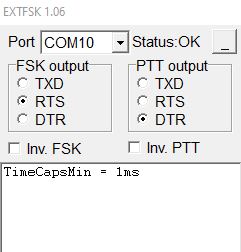
Note: VOX needs to be on for voice and data modes.


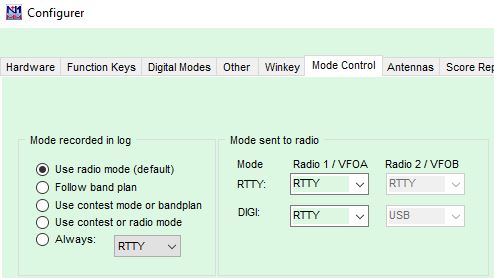
These can be entered in to the Function Keys for N1MM logger
{CAT1ASC PB0#;} where the # is number 1 to 5 for the message
banks.
{CAT2ASC PB0#,} where CAT2 is for the 2nd rig if using SO2R setups.
Note: If using VOX, VOX Select needs to be set to DATA for data modes.
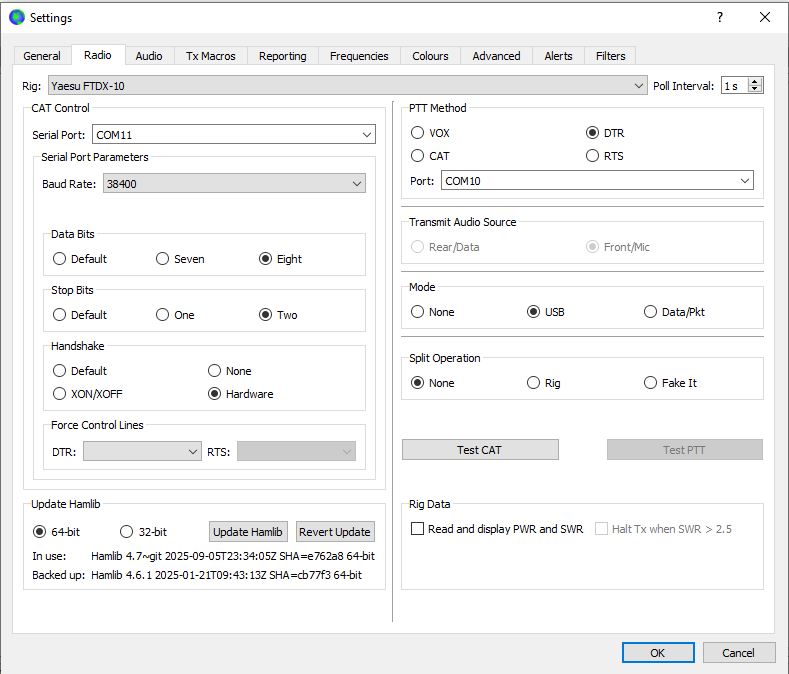
COM10 is my Standard COM port and COM11 is my Enhanced COM Port.
Two sound cards are needed. The FTDX10 provides its own USB Audio Codec, and the one on your PC.